Take Better Travel Photos!
My Top 10 Tips That Anyone Can Use
If you’re anything like most people, you want to get the best images when your traveling but without too much hassle or extra gear weighing you down. Here are some of my favorite tips to make the most of your travels, no matter what kind of camera you’re shooting with.
- Travel Light.
If you’re shooting with a smartphone, I recommend going all-in on the very best quality camera phone you can afford, and adding accessories to boost image quality. You can pretty inexpensively add a variety of lens attachments and a small tripod to your travel bag that will be a breeze to carry around. For more serious shooters, you can still travel light as a feather with top quality gear. Sony, Olympus, Fuji, Lumix, even Leica (and so many more great camera brands) all have smaller, even pock-sized options with tricked out professional specs and top image quality. With mirrorless, Micro 4/3 and yes, even some high end point-and-shoot cameras, there are tons of travel-friendly options these days that won’t weigh you down (or let you down). - Patience and Planning.
Make sure you know (and prioritize) your key points of interest for the places you want to see, and plan for enough time to take them all in. Do the most important ones first, just incase things don’t go as planned. That way, you won’t miss the mark, and everything after that is just gravy. If I’m really tight on time, I might hop on a local sight seeing tour, just to get my bearings on where things are, and how I’m going to get back to the most interesting spots later. If you do that on day one, every day after that you can make first hand decisions about what areas are more interesting to you personally, and what you might prefer to skip all together. PRO TIP:Don’t visit popular areas at peak traffic times unless you want a ton of tourists in your photos. Try getting up early and shooting at sunrise (instead of waiting until sunset) to beat the crowds. Or visit those big attractions during a weekday instead of the weekend, or in maybe the off-season. - Upgrade Your Experience.
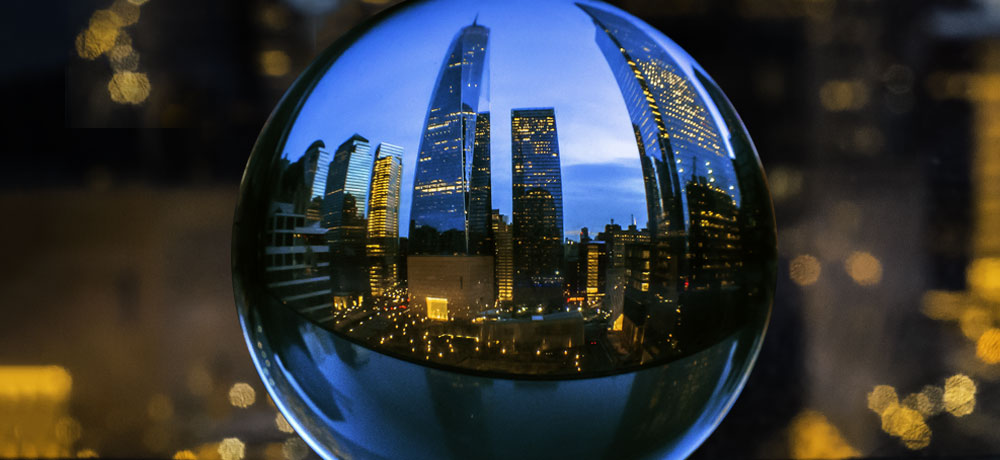
If you have the means and the option, definitely splurge on that room with a view! This will give you increased odds for catching those nice sunrises & sunsets right from your room, just incase mother nature foils your perfect plan for that scenic boat ride or sunrise mountain hike. The cover image for this article was shot from the comfort of my hotel room (in my PJ’s), while the outside temps were a below freezing! PRO TIP:If you have to shoot thru a glass window, just make sure you turn out all the lights, and place your lens right on the glass to eliminate glare. Or you can also try using using a towel or a black jacket to cover your camera and block artificial interior light. - Look for the Locals.
Before you even arrive, scour Instagram for local hashtags to see what’s happening in the area you’re traveling to. When you get there, go out of your way to strike up a conversation with that barista or bar tender, or maybe just the person sitting near you on the train or standing in line at the ice cream shop. These are the people who can tell you if your just around the corner from the coolest local artist market, or what unique things might be happening in the neighborhood. - The Golden Rule.
The biggest tip for capturing all those spectacular views, from cityscapes, to beaches or mountain vistas, is actually all about the timing. Maybe it’s not always possible, but as much as you can, try and position yourself at the most scenic spots around either sunrise or sunset. Mid-day sun is way too bright, and creates harsh shadows and hot spots in your photos. Take the same shot at “golden hour” and notice how much more beautiful and ambient your images turn out. If you’re in city or town, wait for the building and street lights to come on, which is usually just after sunset/golden hour, during what is called “blue hour”. PRO TIP:For best results, make sure you’re using a tripod, and shooting long exposures in manual mode (most cameras will have a “night” setting you can use if you’re a beginner). If you don’t have a tripod, look for a table, ledge or other flat surface you can use to steady your camera on. - Get High, Get Low, Get Creative!
Always push yourself to look at things differently. Experiment with angles, lighting, shapes, depth of field, perspective, color, etc. A lot of images look the same because a lot of people take photos from their eye-level, looking directly at what’s in front of them. Change the perspective, move around, look up, look down, look through trees, fences, holes, puddles, reflections, etc. Don’t be afraid to lay on the ground, get a little dirty or disheveled, or risk the possibility that someone might think you’re weird for contorting your body into whatever position necessary to frame the perfect shot. Just don’t step in front of moving traffic, lean too far off the observation deck of a tall building or get too close to a mama bear and her cubs(!) - Waiting and weather.
Give yourself some time, especially around golden hour, and hang out and watch the sky and cloud patterns. You will rarely ever just show up to a perfect scene, snap one photo and leave. Getting the golden goose of a photo is a bit of a waiting game. You will also want to watch the weather, and if there’s rain in the forecast, that can mean a big payoff. Some of the most vividly colored sunrises/sunsets occur just before or after bad weather, so a chance of rain should not spoil your day, it just might be the silver lining you were hoping for. PRO TIP:If you are out shooting during the day at high sun, choose a day with bright blue skies, and lots of puffy white clouds. The clouds will soften the harsh sunlight, and add rich texture to your day scapes. Clear blue skies are the absolute worst for photography, so you can relax a little and just enjoy the day, and save your energy for a partly cloudy day! - Right place wrong time?
What do you do when you show up to a gray, wet blanket or a hazy, foggy/soggy mess? It can be discouraging for sure, but you should still shoot something, especially if you may not return to that spot. Dull, dreary weather may not give you the vivid beautiful colors you were hoping to capture, but you can get some really dramatic BLACK AND WHITE images! Also, rain produces wonderfully photogenic textures, like drops and puddles which are great for reflections. PRO TIP:Be sure to keep a plastic grocery bag with you, so you can keep your camera safe and dry from the elements. You can even put your smartphone or a small pocket-sized camera in a zipped/zealed sandwich bag. - Editing is Essential.
Even if it’s just subtle tweaks, it doesn’t take much effort to get the very best out of your images. Make that beach water as bright and clear as it can be, punch up the green of those palm trees or the brilliance of that stunning sunset. Find an editing tool that works for you, and master it. YouTube is a great resource for how-to videos if you want to fast-track your learning. - Smart Social
When sharing, don’t forget to use local hashtags that are relevant to your subject matter. Also, always tag a location, and any relevant businesses or attractions in your shot. A short, personalized caption that summarizes your experience always helps, and don’t forget to like and respond to comments from your followers. All these things will make your images more discoverable and increase engagement. PRO TIP:If you’re a professional, remember that competition is fierce, so keep up with trends and top influencers. Make sure you’re following quality accounts, and interact with them as much as you can. Position yourself in the company of good creators, and you will have a better chance at becoming a quality creator yourself.
So that’s it, now you know all my best tricks for shooting light & smart on the go. If you liked this article, or if you have some tips of your own you want to share, please let me know below or holler at me (@graphiknation) on Instagram, Flickr or Twitter. Or if you’re ever in the mood (and in the ATL) come shoot with me and the Atlanta Urban Photo Walkers sometime!
#travelphotography #traveltips #phototips #travelphoto
GEAR:
I predominantly use Mirrorless/Micro Four Thirds cameras and lenses by Panasonic LUMIX & Olympus, and I also recently bought a Sony and have been giving that a try. You can browse all my favorite camera gear on my Amazon Influencer Page, where you’ll find links to all of my favorite cameras & lenses from LUMIX, Olympus, and Sony. I edit professionally in Adobe Lightroom & Adobe Photoshop. I post a curated collection of images consistently on my Instagram feed, or you can find even more of my professional photography on Flickr.
As an Amazon Associate I earn from qualifying purchases.